Dark Chocolate Apple Truffles

So roasted apple powder is something I make myself but if you do not have it it is fine.

Yes I still cook just cant do it professionally. This is for something that is not a sugar bomb. Make ganache by mixing spiced apple cider mix and cream, heat that up to scalding and pour on your chocolate stirring until it is all melted and smooth. Chill until solid and roll to size before dropping in container and coat.

I make my own Roasted Apple powder and it is delicious if you do not have it. Ground apple chips in the food processor works, apple cider mix can be used again, or it can be omitted.

Excerpt – Time, Fire, and Cuisine

Coming from the Pacific Northwest there just has to be some recipes with seafood. This one is a good way to do any white meat fish and it doesn’t take million dollars to make either. Chicken works well for those who do not do well with fish. On previous pages you can also see how people are supposed to grow so that nothing is impossible and after reading my books you could cook a lot better. That would be the plan at least

October 6th – Fish a la Piccata

Translating loosely to miller style fish this works best with white meat fish fillet. Trout is the recipe here but halibut and cod can work if you so chose. Any white meat fish is acceptable as long as it can hold through a pan frying. The fat of choice for this recipe is a blended olive oil or clarified butter. Pat the fish fillet dry before dusting with an all purpose flour. In the pan an ounce of your choice of fat should be simmering from the heat.

Place your fish in the fat to let it cook. If one side has skin then you will want to let it cook more on one side then the other. On the other hand skinless fillet can be found although they do break up easier. As the meat cooks you will want to make a sauce to accompany it.

Mince six small capers with a heavy pinch of parsley so that you are left with equal portions of each.

1:1:1 Minced capers to minced parsley to lemon juice

After your fish cooks dump the sauce ingredients in to saute for a moment. Next you will want to remove it from the heat while swirling a pair of small half ounce chunks. Monte Au Buerre in full affect your sauce should be warm and ready while your fish has rested slightly before plating.

Pour a small portion of the sauce under the fish as it rests against your starch and vegetable of choice before ladling a small amount over the top of it. It should have a nice looking dark colored sear that can hold up to the sauce.

If the salty flavor of the briny capers isn’t really up your alley minced sweet pickle or cornuchons can be supplemented for a portion or for the entire part of the capers.

Chili Mac – Home Cooking

So after thinking about some thing I decided to get back in the kitchen to make some meals so I don’t eat the same thing 18 times in a row when writing, drawing or learning some stuff on Alison (free education website). A nice little stretch of macaroni and actually a nice dish overall. If you like cheese on top of your chili this will actually turn a couple meals in to about a week’s worth. Here is what you will need for a large pot of Chili Mac.

101_0863

Ingredients

6 C Dry Macaroni
3 Cans of Chili
1/2 Lb Cheddar, Shredded
1/3 C Grated Parmesan Romano
1 pt or 2 C Heavy Cream
1/2 stick Butter
Chopped Green Onions to Garnish.

Makes 6-8 servings

Just to let you know my cream is frozen. So first we start with the macaroni. Boil that up.

101_0864

After its cooked you can drain the noodles to begin working on the cheese sauce make sure the cheddar is shredded. If you have the boxed mac and cheese just make it as you see fit. On low heat you want your butter, cream, and cheeses until everything becomes one. Push the heat higher and the sauce may curdle.

101_0866

After everything has been melted and the sauce been tasted and seasoned here is where you have the option to add some green onion. I add some to mine to give a little bit more color to the whole affair. It is not needed however.

101_0870

After your sauce is simmering heat your chili up in another sauce pan or in the microwave whichever is easier just until it all becomes more fluid. Put your noodles back in the sauce, add your chili making sure the chili and noodles have a nice meet and greet of flavors in the pot.

101_0875

After all that is done. finish with your garnishes and serve or in my case freeze and eat as you see fit. Add some hot sauce if you like to give it a little more heat.

101_0877

I had a little cheddar left over so that was used as a garnish as well. In any case its a mild dish without being boring and it holds long enough that I will have been eating it while working on my other projects.

Fried Rice –

Hey everyone, time for another simple recipe this time to use up any rice you may have this works best after the rice has cooled. You will need the following.

101_0828

3 large eggs
1/4 C chopped green onions
2 qt of long grain white rice

Of course you want to have your seasonings of choice on hand. In a non stick pan on medium high heat start by cracking your eggs in to the pan until they begin to get opaque. Next is to toss your rice mixing the two together until the eggs are almost completely cooked. Picture below for example. Make sure to keep your rice moving as to not get over cooked in places this dish from start to finish takes less then five minutes if the rice is already cooked.

101_0831

Last is to add your green onion as well as any seasonings you prefer, making sure to mix everything up with your spat of choice.From there just plate up Mine in the pic has a little bit of chili powder for color and a touch of heat. Shredded seaweed works well, and of course you can always just grab a spoon and dig in.

101_0834

If you do not want to use or do not have a non stick pan then just a drop of oil is needed before putting the eggs in. From there just go for it.

Next, two recipes on this blog will be a tofu dish fried and with sauce over rice once again. Rice was on sale so I got a big bag to last me for a while. The other recipe will be a dish I actually took as a challenge / idea from someone on twitter. Breakfast cupcakes. Me being a stickler for things got to be a problem there, but over all the dish tasted good and was actually very good for breakfast. If you

Chili tofu

Now with this you can put it over rice or noodles. I still wasn’t sick of ramen so I used dry pack ramen noodles. The chili tofu is hot though so if you can’t stand the heat find a substitute. Cooked vegetables work well or even just a touch of soy after the tofu is browned in pan. For the chili tofu you will need the following.

Tofu

A 16 oz package of tofu – Extra firm – tofu normally they come in 16 oz portions so no worries about over shooting and if you don’t want to make a full batch just replace the water in the tofu container before putting your remainder portion and that should give you about a week of time to play with it.

2 t of vegetable oil to help lubricate a wide shallow pan for the tofu

2 T chopped garlic

1/4 C sweet chili sauce or (1/8 C water, 1/8 C sugar, 3 T red chili flake)

1/4 C ketchup or (1/2 C tomato paste, 1/2 C white wine vinegar, and reduce to half)

Your seasonings of choice in my case.

Set your pan up and place on medium high heat. Oiled and ready we then move to the tofu and for this you will need a plate and a couple extra paper towels to make it easier on yourself. Open the package and drain it before setting it on the plate and pressing the paper towels lightly in to it. What this does is help remove some of the excess water so it will be easier for you to saute without breaking in to chunks.

What if it breaks in to chunks anyway? Use less sauce smaller pieces will not need so much to represent the same heat level. Other then that no changes so go for it. Next take your knife of choice and chop it up first in to planks before going in to cubes.

cut tofu

Behold cut tofu. Now after chopping your tofu up toss it in the pan.

tofu 3

You should get some sizzle as you drop it in so after that if you have to fuss with it you can set up your sauce to be poured in later. It will take some time to get a nice even browning or you can be like me.

tofu4

After about ten minutes let it flip and toss in your garlic. If you want it to be more browned what you do not want to do is try to scrape it from the bottom of the pan within the first few minute you will have more of a chance of the tofu cubes breaking if that happens. After the garlic gets some browning time you want to add your sauce.

What if I let the garlic cook to long or everything seems dry in the pan?

Great question, now with tofu because it is so porous their will always be some absorption and the garlic will help with that so if you need a little more liquid  as soon as your going dry you can add a couple drops of oil to finish your browning. Or if you say my ingredients I also had a lemon and an orange. They were on sale and I don’t get a lot of fruit so you can add the juice of a couple citrus.

tofu5

I like mine a little hotter then normal so this is with an extra teaspoon of chili powder with the citrus juice to produce that red color. As soon as you finish this if you let things cook until they stick the pan still the juice will help bring those particles back up to add some flavor to your sauce. Add your mix of sweet chili sauce and ketchup to the pan and let it reduce a little making sure to get all the flavors together to properly introduce each other.

tofu 6

Ketchup has been used in dishes like this for many years, and old fans of Iron chef will remember the Chen ken min had a delicious prawns in chili sauce recipe that worked with ketchup as a base. If you don’t feel comfortable though you can pull back on it or make a quick version from the ratio I put up.

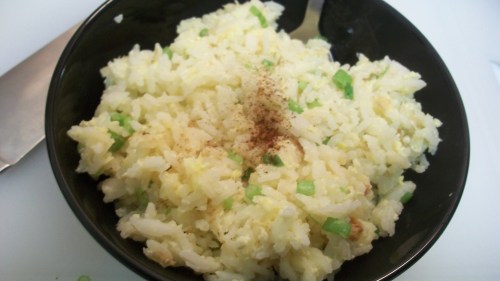
So after your sauce is ready its thick, full bodied, and delicious you need to have something to serve it with. For things like this I gotta go with the incredible edible egg. High in protein and adds just the right match to spicier things over rice or noodles in my opinion.

end

Lightly fried egg and spicy tofu over noodles. Enjoy, if you like anything I have been up to comment and if you know someone that could enjoy one of these please show them the way to my little corner of the internet.Oh and before I forget you can actually catch me at the twitter thing call me old fashioned if you like but I am at oneguyportland on the twittery thing. Have a good one everybody.

Pork with Blackberry Cream

This dish pairs well with the apple onion salad from last week.

Here is what you need for this dish for a pair of servings. 4 thinly cut 3-4 oz pork chops, a cup of cream, 12 blackberries, an orange as well as a pair of rosemary sprigs. Garlic always matches with pork and S/p for seasoning is always good to get all the flavors to meet up on amiable terms.

101_0798

Begin cooking your pork on medium heat. After they are just cooked let them rest for a moment. Seeing my pan after the salad and pork their is a lot of bits stuck to the bottom. Using a high acid liquid like a citrus juice or vinegar we can use those bits to flavor our sauce in a technique called deglazing.

. 101_0800

After juicing your orange on medium heat let it simmer and mash your blackberries and rosemary making sure to scrape up the bits stuck to the bottom of the pan before continuing. Those bits are flavor particles ready to add to the arsenal of the sauce. When the juice is half reduced strain it before adding your cream.

101_0803

Let the strained juice and cream mix before reducing until the cream is half gone. As soon as it is thick enough that it holds to the back of the spoon for just a second before dripping completely off. Now this was actually made for a co worker who was leaving. She wanted a meal cooked by me on her last day. This paired up with the apple onion salad for a box lunch like 101_0804

This. The small containers are the blackberry sauce and the mustard dressing.

The pork was so thin I did not get the color I wanted on the outside, but it was still juicy without being pink. The sauce was a great compliment that was much more graceful then I originally thought it would. All in all it was a good thin and if you try it let me know if you do any of your own twists on it.

One thing I did not like was the color everything was kinda beige without the blackberry cream. After this I garnished with a couple pinches of fresh chopped rosemary before heading to work.

Potted shrimp

For two servings you will need the following…

Half lb of shrimp meat, three ounces of salted butter, teaspoon of chopped garlic, teaspoon of honey mustard, four slices of sourdough bread and chili powder for garnish.

This appetizer comes from across the pond originally made with brown shrimp you can make it with shrimp meat like me if you do not mind seasoning your butter a little bit stronger.

Potted Shrimp Ingredient


I like having the butter melt so you can season and make everything mix completely. Whisk your mustard and garlic in with the butter over low heat before dumping your shrimp in the butter. Cook in the butter until meat begins to turn white , and for the miniature shrimp that is about ninety seconds on low heat.

butter mix

Mustard and garlic halfway mixing before tossing the shrimp in. After your shrimp is done you pour in to a pair of ramekins and while some prefer this chilled I actually enjoy this the most while everything to smear on toast making a delightful meal. Garnish with Chili powder if you like a little bit of heat at the end all the a quick grind of pepper works too.

finish potted shrimp

When you chill the butter mix with the shrimp the butter will grow opaque but the shell will be much thinner then you think. After you chill them  the meal is just delicious with some toasted sourdough for breakfast. I had some garlic sourdough I bought on sale from the local Franz store I just warmed up to eat with. Chilled properly the potted shrimp can last a week without major issues as long as it is refrigerated.chilled potted shrimp

If you can find your way to get some butter and shrimp with a couple slices of good bread then you can make this the focus of a good meal in the autumn sun watching the beautiful colors of the leaves maybe with a nice glass of whiskey and cheesecake. Hope you enjoy your own version of this dish.

Chicken a la kiev

Chicken a la kiev is a dish I found a recipe to in the old cookbook. We will do some slight changes here is what you will need.
Chicken breasts (skinless and boneless)
Egg for breading
Breadcrumbs for breading
Seasoning for the breadcrumbs
I use a combination of parmesan cheese and old bay to season my breading

Compound butter –
A compound butter is a butter mixed with other things to add more flavor and has been used in kitchens as a form of sauce. In this recipe my compound butter was made with an addition of crushed garlic, green onion, and honey mustard with a splash of lemon juice.

After mixing it all together you want to put your butter in the freezer. If you like everything a certain shape you can fill up an ice tray half full so you get little squares of butter already setting up.

Butterfly your chicken and after the butter has frozen stuff in the middle of the chicken before breading it up and dumping it in a frypot already heated up. Let it cool and dress as you see fit. If you do not feel comfortable putting frozen butter in raw chicken then you can put the butter on top before plating. The butter will melt to form a sauce to match the chicken.

After plating garnish with what you want. I use a small little piece of muenster cheese to work with the small amount of butter.

Stuffed Chicken with cheddar and mustard sauce

So with this recipe your going to need the following for one plate

2 4oz portions of boned and skinned dark meat chicken, 2 oz cheddar, 3 slices of bacon, olive oil for pan frying. For the sauce add a tablespoon and a half of dijon mustard, a tsp of honey, and a quarter cup of heavy cream.

ImageImage

Image

So start out with your pan on medium heat and begin to cook your chicken after both sides have been flipped and cooked through. Stuff them with cheddar and let it sit for a moment while the bacon cooks. Drain the pan of your fry oil before dropping your bacon in to the pan. Cook your bacon through while making sure that it does not turn to glass. This will be the layer between your sauce and the chicken.

ImageImage

While this recipe is very rich the sauce should have a very refreshing bite. Either from the horse radish and acidity in the mustard or from additional seasoning. Other ways you can roll it is using addition of chives or cayenne pepper for additional color. The light heat of the seasoning or the fresh aroma of the chopped chives adds anew dimension to this. When you make the sauce all you have to do is put it all in a clean pan let it simmer after whisking together until the volume decreases by a third to a half.

Layer your bacon on top of your chicken and pour the sauce on top of the bacon gently then enjoy. So hope you enjoy and hopefully after eating this you get one step closer.


ImageImage

The earned sandwich

Hope you all had a fun month. So Valentine’s day has come and gone with much ado. This recipe is all about what you need after a harsh night of love day activities. Get some protein back in your system with the earned sandwich.
Image

Here are your items needed : 4 slices thick cut bacon, 2 slices wheat bread, 1-2 oz slices pastrami, one egg, some semi soft cheese of choice (In this case Gruyere), and sweet mustard.

Get some paper towels and begin with cooking your bacon. you want it crisp with some give. Let it drain and leave all the beautiful bacon grease. That grease will be what you fry your egg in do so on medium heat, and if your a little nervous you can lower the heat and let it go a little slower. The hard thing will be that when you try to flip it. When the outside is cooked through but the yolk Image

is just beginning to cook through that is when you should put it aside.

After this you should have a little bacon grease left in the pan. You can use this to toast the bread slightly or to warm up the pastrami. For mine below I used it for the pastrami. The wheat bread I get is nice and soft and combined with the semi crunchy bacon provides some contrast texture wise. If you want to cook your pastrami top it with a little bit of the cheese and try not to flip it just letting the heat come through to start it.

Building your sandwich because you earned it .

Get your sweet mustard and lightly dress one side of the bread with it . Then layer cheese, bacon, egg, pastrami, and bread.

While the egg and bacon is cooking you can cut your cheese. For mine I wanted it that it was just warm. placing on some on top of the hot egg when it began to rest and topping it with hot pastrami made the cheese a team player on this sandwich.

Image

Yes, I forgot to wipe my plate before taking the picture. It is always amazing how you never think of things until you see pictures of it.

In either case this is the earned sandwich. If you prefer your egg more cooked then just give it a little more time in the pan. Next blog post will be coming soon. Until then everyone, have a good one.